Bomberman Fantasy Race
gameplay
|
A 3D racing game. Each race is against four other opponents, and the goal is to claim first place. All players have the ability to drop or throw bombs, which can be used to attack opponents or even speed yourself up (see hints and tips). Items can be bought or collected to improve your abilities or fend off enemies, but there is a risk of getting a curse; see Items for more details.
|  |
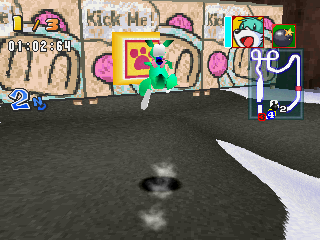
Although combat is an important part of the races, you cannot die in this game. The players can crash into walls, be hit with bombs or fall down pits, but within a few seconds they will get back on their feet or be carried back onto the course.
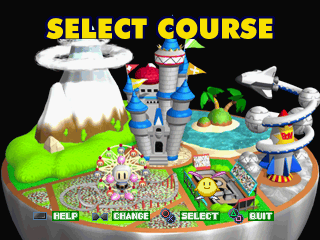
 Finishing the race in first, second or third place will reward you with money (GB), which can be spent on items, new runners or new courses. Getting first place will take you to a Bonus Stage, where you take a one-lap run around the course under a time limit, alone, the aim to collect as many coins as possible. If you finish the Bonus Stage within the time limit, you are awarded additional money depending on the time remaining (10GB is awarded for every second remaining), with a coin bonus for collecting all coins.
Other modes include Time Trial, where you can visit courses alone and aim on improving your records.
Vs. Mode allows two players to challenge each other to a race; two save files are required for the race. The available courses and runners is determined by each player's save file. Bets can be made, and whoever the victor is will claim the money - the player with the least amount of money sets the bet.
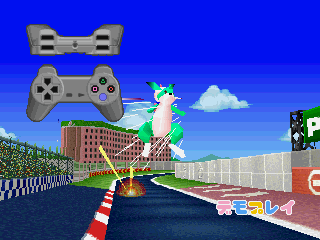
Controls
All controls can be changed in the Options screen.
| BUTTON | ACTION |
| Control Pad | Press Left or Right to turn. Hold Up to dash. Hold Down to brake. |
| X Button | Accelerate. |
| CIRCLE Button | Jump. Press again in mid-air against an object to wall-kick off it. |
| SQUARE Button | Throw bomb / use item. Hold the button longer to throw a bomb further. |
| TRIANGLE Button | Toggle camera setting (far view; first-person view; and normal view). |
| R1 Button | Toggle selected item. |
| L1 Button | Toggle HUD (course map; proximity radar; or none). |
| START Button | Pause game. |
| SELECT Button | View help screen. |
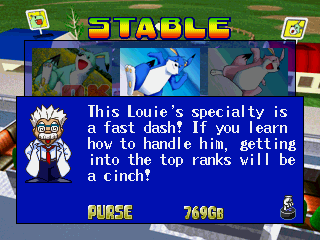
Instead of karts, the vehicles used in this game (or "runners" as they're referred to) are animals - the Louie and Tirra, introduced in Bomberman '94 and Saturn Bomberman respectively!
Louies excel at turning and handling, at the expense of less speed and acceleration.
Tirra are best suited for raw speed, but are comparatively slippery to control.
The prices are different between the Japanese and international releases - Japanese prices are captioned with (J), English prices are captioned with (E).
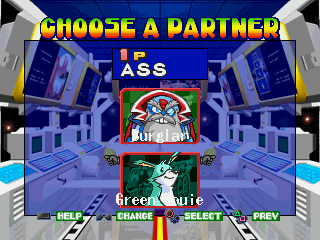
Green Louie / グリーンルーイ SPEED: 1
DASH: 4 JUMP: 2 STAMINA: 1 COST: n/a
|
Tirra / チッラ SPEED: 2
DASH: 1 JUMP: 1 STAMINA: 2 COST: n/a
|
Hopping Louie / ホップルーイHop Louie - JPN NAME SPEED: 1
DASH: 4 JUMP: 3 STAMINA: 1 COST: 100GB(J) / 1000GB(E)
|
Brave Tirra / ガッツティラGuts Tirra - JPN NAME SPEED: 2
DASH: 2 JUMP: 1 STAMINA: 5 COST: 100GB(J) / 1000GB(E)
|
Tri-Louie / トライアングルーイ SPEED: 1
DASH: 4 JUMP: 4 STAMINA: 1 COST: 200GB(J) / 2000GB(E)
|
Flying Tirra / フライングティラ SPEED: 2
DASH: 4 JUMP: 4 STAMINA: 2 COST: 200GB(J) / 2000GB(E)
|
Soaring Louie / ハヤブサルーイHayabusa Louie / Falcon Louie - JPN NAME SPEED: 2
DASH: 5 JUMP: 2 STAMINA: 1 COST: 400GB(J) / 4000GB(E)
|
Mighty Tirra / ストロングティラStrong Tirra - JPN NAME SPEED: 3
DASH: 3 JUMP: 1 STAMINA: 2 COST: 500GB(J) / 4000GB(E)
|
Hyper Louie / ハイパールーイ SPEED: 4
DASH: 5 JUMP: 2 STAMINA: 3 COST: 2000GB(J) / 8000GB(E)
|
Super Tirra / スーパーティラ SPEED: 5
DASH: 4 JUMP: 1 STAMINA: 3 COST: 3000GB(J) / 9000GB(E)
|
Black Louie / ブラックルーイ SPEED: 5
DASH: 6 JUMP: 6 STAMINA: 5 COST: 10000GB(J) / 100000GB(E)
|
King Tirra / キングチッラ SPEED: 6
DASH: 6 JUMP: 4 STAMINA: 6 COST: 10000GB(J) / 150000GB(E)
|
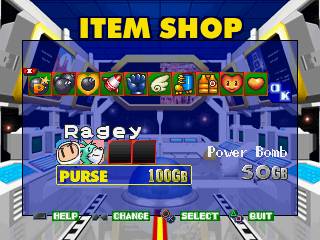
There are two ways to collect items - by picking up an item panel during a race, or by buying it before the race. Item panels give you a random item (or curse!), but another panel (item or egg) cannot be collected until the current item is used. Up to two items can be bought from the shop, and are reserved until you access them by pressing R1 (in the default control setting); reserved items must be used in the same order you bought them.
Items are lost when you are damaged; even items bought from the shop. Use them quickly or don't highlight them until you know you're going to use them!
Bomb / ボム (DEFAULT)
![]() The default item used when no item panel has been collected. Hold the button longer to throw the bomb further; hold it for too long and it flies right off the map! Players hit by a bomb will either by shaken or knocked off their feet, depending on the blast's proximity.
The default item used when no item panel has been collected. Hold the button longer to throw the bomb further; hold it for too long and it flies right off the map! Players hit by a bomb will either by shaken or knocked off their feet, depending on the blast's proximity.
Can also be used to bomb dash - see hints and tips.
Egg Panel / エサパネル (COURSE)
![]()
 A unique item collected via a Egg Panel; up to three of these can be stored.
If used by a Louie, it will make them run faster.
If used by a Tirra, it will create a protective shield - the effects last longer depending on how many eggs are stored.
Rocket Bomb / ロケットボム (250GB, COURSE)
![]() A homing missile that will knock an opponent off their feet. It will supposedly fly further if you hold the button for longer, but I never noticed any difference. It has a bad habit of crashing into scenery and not being of much use unless the target is in plain sight. Don't expect this to turn the tides of a battle unless used strategically (like near a pit).
A homing missile that will knock an opponent off their feet. It will supposedly fly further if you hold the button for longer, but I never noticed any difference. It has a bad habit of crashing into scenery and not being of much use unless the target is in plain sight. Don't expect this to turn the tides of a battle unless used strategically (like near a pit).
Remote Control Bomb / リモコンボム (100GB, COURSE)
![]() Throw it on the ground and it'll lie there until you press the button again, detonating with the power of a Power Bomb. If you lose the item then it will detonate automatically, and colliding with it will yield the same result.
Throw it on the ground and it'll lie there until you press the button again, detonating with the power of a Power Bomb. If you lose the item then it will detonate automatically, and colliding with it will yield the same result.
Power Bomb / パワーボム (50GB, COURSE)
![]() This bomb boasts a blue explosion with a larger radius and the power to knock a racer off their feet, stunning them for longer. Best used in crowds or cramped spaces.
This bomb boasts a blue explosion with a larger radius and the power to knock a racer off their feet, stunning them for longer. Best used in crowds or cramped spaces.
Line Bomb / ラインボム (10GB, COURSE)
![]() The same as a regular bomb, except you also throw two at the sides.
The same as a regular bomb, except you also throw two at the sides.
Power Suit / パワースーツ (200GB)
![]() This creates a temporary protective shield that neutralises enemy damage, much like a Tirra's usage of the Egg item.
This creates a temporary protective shield that neutralises enemy damage, much like a Tirra's usage of the Egg item.
Wing / ウィング (30GB, COURSE)
![]() Your time in the air from a jump or fall increases, making you floaty. You can't change direction in mid-air, however, so you need to re-calculate your jumps. Nothing's worse than spending an eternity waiting to fall into a pit. It may as well be a curse.
Your time in the air from a jump or fall increases, making you floaty. You can't change direction in mid-air, however, so you need to re-calculate your jumps. Nothing's worse than spending an eternity waiting to fall into a pit. It may as well be a curse.
Power Glove / パワーグローブ (150GB)
![]() Throw this baby down and your bomb will plough on forward across the ground, crashing straight through any enemy until it hits a wall.
Throw this baby down and your bomb will plough on forward across the ground, crashing straight through any enemy until it hits a wall.
Heart / ハート (200GB)
![]() This recharges your creature's stamina and keeps it maxed for a short while.
This recharges your creature's stamina and keeps it maxed for a short while.
Mini-Heart / ミニハート (20GB)
![]() This recharges your creature's stamina, but doesn't keep it maxed.
This recharges your creature's stamina, but doesn't keep it maxed.
Roller Shoes / ローラーシューズ (50GB)
![]() This speeds you up for a fair amount of time, much like a Louie's usage of the Egg item.
This speeds you up for a fair amount of time, much like a Louie's usage of the Egg item.
Time Stop / タイムストップ (COURSE)
![]() This freezes enemies in their tracks for approximately three seconds. It may not sound like much, but that's a valuable three seconds.
This freezes enemies in their tracks for approximately three seconds. It may not sound like much, but that's a valuable three seconds.
Trap Panel / ハテナパネル (COURSE)
![]()
 Although thrown like a bomb, this creates a fake item panel where it lands, and any player who collides with it is electrocuted and stunned for three seconds. It can be identified by its darker hue and "FAKE" text.
Skull / ドクロ (COURSE)
![]() Every time you collect an Item Panel, there's a chance you'll instead be inflicted with a curse! The curse will last for several seconds before wearing off. The curses include:
Every time you collect an Item Panel, there's a chance you'll instead be inflicted with a curse! The curse will last for several seconds before wearing off. The curses include:
 Bomb Drop / 下痢: Throwing ability is reduced to minimum.
 No Bomb / 便秘: No bombs can be used at all.
 Wet Fuse / 不発弾: All bombs will lie undetonated until the curse expires.
 Power Throw / 全力投球: Throwing ability is increased to maximum - sailing right off the course.
 Random / ポイ捨て: Bombs will be thrown involuntarily until the curse expires.
 Reverse / リバース: Directional controls are reversed - left is right and right is left.
 Iron Sandals / ゲタ: Running speed is decreased.
 Poopie / うんち: Your runner will stop and take a crap, wasting valuable time.
For course data, maps and tips, see the following pages:
| Bomber Circuit | Bomber Coaster Lake | Wacca Isl Beach Side | Bakuzan Ski Course |
| Star Express | Dyna Mountain | Bomber Castle | Highway Star Road |
Walkthrough information should hopefully be self-explanatory. The maps are from the in-game mini-map; the green numbers are where I have comments regarding that part of the track, and the (barely visible) yellow dots are recommended locations to bomb dash (though not a lot of thought was put into them).
Cornering
Letting go of the accelerator lets you turn better. Yeah. Not much, but it's worth knowing.
Bombs
Bombs are a primary part of the game (you don't say!). They are your primary method of attack, and they work in mysterious ways. You can tap the button to simply drop one to explode behind you, or you can hold the button for an extended throw, in which case it can fly off the course completely if you hold it too long.
If an enemy is within range then the bomb will head in their direction, regardless of whether or not it will work; if they're turning then it'll miss them completely, and if it's too far or too short to reach then obviously it'll just hit the ground. When you're aiming for other targets, this can be frustrating.
Bomb dashing
 Additionally, bombs give way to the advanced technique of bomb dashing. In a nutshell, the bomb explodes around you and thrusts you forward for a convenient speed boost. The problem is that it can be very fussy with what constitutes a dash and what just makes you harm yourself. You have to aim for the centre of the blast for it to work most of the time, but where exactly you are in it aside from horizontal alignment appears to be unnecessary; you can have it explode at your heels, or it could be almost about to dissipate when you run into it.
This can be a bonus or a hindrance depending on your situation. One should be wary that bomb dashing leaves you at risk of colliding with a wall, either causing you to bounce off and fall on your face or downright splat into it. Neither is appreciated, but the latter is more harmful to time wasted.
Items
 Items may seem diverse and interesting in their effects, but at the end of the day, they're really just best for fending off opponents. Line Bombs and Power Bombs are best used in narrow areas where the opponent has no chance to avoid damage, the former are best dropped behind you.
Rocket Bombs are a whole different kettle of fish: Their explosions always knock an opponent off their feet, but the accuracy is often inconsistent. Depending on the terrain and when you fire it, it can get a direct hit, miss the enemy, or simply fly off course. Holding the item button until it's fully charged can seems to mostly prevent it going off course, but nothing can truly solve the accuracy problem. Using it up close may sound good, but you yourself can get harmed by the explosion, which is never good.
And Time Stops? Use them immediately. You don't want to risk losing them!
Dashing
Dashing is important. It makes you move faster. It's a "no-duh" remark, but make use of it whenever you can without endangering yourself. The stamina gauge can be limiting, but sometimes it pays off to choose a runner with less speed but more stamina, if just for the longer dash.
Triangle jump
 The manual tells you to "master the triangle jump" (or "wall-kick" as it is also known). Personally, I see little reason why. Although on catapults it's of incredible use due to speeding you up and sending you down a set path, regular wall jumping just isn't that great. If you know for certain it'll get you out of a sticky situation, then yes, try it. However, due to irregularities of angle, position and so on, it can potentially land you in a further mess. The shortcut of Wacca Isl Beach Side, although incredibly useful, is tough to master due to it requiring pinpoint positioning or else you'll just rebound off the pillars entirely and into the sea.
Triangle jump? It's there, but you can live without it.
Collisions
Regarding the various collisions: You can splat into a wall and slide off comically, wasting upwards of five seconds if at a bad time. You can bounce onto the floor and get up on your feet at a low acceleration. And then you can just recoil, where you lose control for a second and veer slightly, but otherwise remain at your regular speed. If you're in search of a silly risk, you can use that to your inconsistent advantage!
Lamp posts, trees and whatnot are obstacles that always give you recoil damage. Thus, if you make contact in a certain angle, way and fashion, you'll shoot far ahead at the expense of accurate control! ... yeah, it's a pretty terrible strategy, but it exists.
And finally, you can make collisions that don't actually harm you at all, but produce an impact star and cause you to drop your item. These impacts are very hard to predict and also a real pain in the behind since you don't know if you'll lose your hard-earned item or not.
Runners
 Don't underestimate the differences between the runners. You may expect them to simply be basic upgrades, but each one has a unique trait - the Tri-Louie, for instance, has the highest of all the jump statistics, except for possibly the Black Louie. This may not seem like a lot to make note of, but it's invaluable in Wacca Isl Beach Side, where it is the only one of the first five that can make the pillar jumping shortcut.
Don't forget Dr. Ein's descriptions of them all; it could just as well be ludicrous hyperbole inserted by the translators to fill space, but it pays to heed it just to be sure.
Making money
Money making can be a long and tedious task, especially when Mirror Mode offers fabulous rewards for first place but practically zilch for anything else, and laughs at your attempts to get the 100 coin bonus by lowering the timer to a strict limit. However, there are a few ways of dealing with it!
One is simple: Get good at one course and just play it a lot. I personally find Dyna Mountain to be easy enough to memorise and rake in the big bucks. Your mileage may vary.
The other is duplicating your save file, entering both in Versus mode and betting as much as possible, winning the race and repeating until you've got as much money as you can get. Sadly, you can't just send another file your money, so even then it's going to be a long and monotonous ride. Pop a GameShark code in or something and save yourself the hassle.
Computer opponents
 Computer players? They're assholes. But the ones to look out for are Bagura and Pretty Bomber. Bagura will always throw and drop bombs whenever you're around, which can be a hassle due to the irregular accuracy, meaning he'll miss you but can potentially block off a path when the explosion is present.
Pretty Bomber, however, is downright fiendish, especially in Mirror Mode. She'll drop and throw bombs when you're around, but will specifically slow down to ensure your doom. When you're behind her the attacks are not so bad, but get in front of her and she'll gain magical accuracy powers that will knock you for a loop, rather than simply make you recoil. Her accuracy is perfect and the only way to stop it is to simply get out of her sight. You're better off just playing as her and sparing yourself the horrors.
Unlock Mirror Mode
Finish Bomber Castle in first place. Tickets will need to be bought for the mirror versions.
Unlock Highway Star Road
Finish all tracks in Mirror Mode.
Unlock 50 save slots
Normally there are only five save slots to use, but this code will allow up to fifty save slots, without using any extra memory card space!
On the data select screen:
Hold L1, R1, L2, R2, Select and Start, and then press Circle.
| RETURN TO GAME INDEX |
RETURN TO MASTER GAME LIST |
RETURN TO HOME PAGE |
| page last modified: 09/05/2012 | ||