Bomberman
Stages
The only data I can provide for each stage are the enemies, the item, and the size of the stage. The stage size is marked by (H) (horizontal scrolling) or (V) (vertical scrolling); if not marked, it is a single-screen level.
World names come from the American manual.
Enemies in this world:
 Ballom, Ballom,
 Ekutopu, Ekutopu,
 Boyon, Boyon,
 Pass, Pass,
 Pomori, Pomori,
 Terupyo Terupyo | |
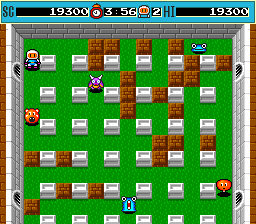
Stage 1-1ITEM: Fire Up |
Stage 1-2ITEM: Bomb Up |
Stage 1-3ITEM: Speed Shoes |
Stage 1-4ITEM: Detonation Switch |
Stage 1-5 (V)ITEM: Bomb Pass |
Stage 1-6 (V)ITEM: 1UP |
Stage 1-7 (V)ITEM: Wall Pass |
Stage 1-8 ITEM: n/a |
Enemies in this world:
Boyon,
Pass,
Pomori,
Terupyo,
 Onil, Onil,
 Gacha Gacha | |
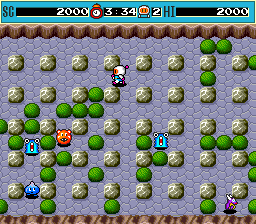
Stage 2-1ITEM: Fire Up |
Stage 2-2ITEM: Fire Suit |
Stage 2-3 (V)ITEM: Bomb Up |
Stage 2-4 (V)ITEM: Bomb Pass |
Stage 2-5 (H)ITEM: Detonation Switch |
Stage 2-6 (H)ITEM: 1UP |
Stage 2-7 (V)ITEM: Wall Pass |
Stage 2-8 ITEM: n/a |
Enemies in this world:
Boyon,
Pass,
Pomori,
Terupyo,
 Uotan, Uotan,
 Boma Boma | |
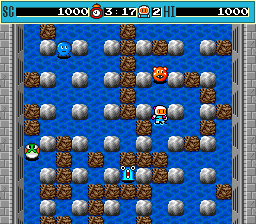
Stage 3-1 (V)ITEM: Detonation Switch |
Stage 3-2 (H)ITEM: Bomb Up |
Stage 3-3 (H)ITEM: Fire Suit |
Stage 3-4 (V)ITEM: Bomb Pass |
Stage 3-5 (H)ITEM: 1UP |
Stage 3-6 (H)ITEM: Speed Shoes |
Stage 3-7 (V)ITEM: Wall Pass |
Stage 3-8 (H)ITEM: n/a |
Enemies in this world:
Boyon,
Pass,
Pomori,
Terupyo,
 Minvo, Minvo,
 Bafa Bafa | |
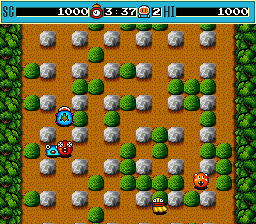
Stage 4-1 (V)ITEM: Bomb Up |
Stage 4-2(H)ITEM: 1UP |
Stage 4-3 (H)ITEM: Bomb Pass |
Stage 4-4 (V)ITEM: Detonation Switch |
Stage 4-5 (V)ITEM: Fire Up |
Stage 4-6 (H)ITEM: Bomb Pass |
Stage 4-7 (H)ITEM: Bomb Up |
Stage 4-8 (H) ITEM: n/a |
Enemies in this world:
Boyon,
Pass,
Pomori,
Terupyo,
 Flapper, Flapper,
 Shashakin Shashakin | |
Stage 5-1 (H)ITEM: Wall Pass |
Stage 5-2 (H)ITEM: Fire Up |
Stage 5-3 (V)ITEM: Fire Suit |
Stage 5-4 (H)ITEM: Bomb Up |
Stage 5-5 (H)ITEM: Detonation Switch |
Stage 5-6 (V)ITEM: Bomb Pass |
Stage 5-7 (H)ITEM: 1UP |
Stage 5-8 (H)ITEM: n/a |
Enemies in this world:
Boyon,
Pass,
Pomori,
Terupyo,
 Nagacham, Nagacham,
 Korisuke Korisuke | |
Stage 6-1 (H)ITEM: Bomb Up |
Stage 6-2 (V)ITEM: Bomb Pass |
Stage 6-3 (H)ITEM: Fire Up |
Stage 6-4 (V)ITEM: Bomb Up |
Stage 6-5 (V)ITEM: Fire Suit |
Stage 6-6 (H)ITEM: 1UP |
Stage 6-7 (V)ITEM: Detonation SWitch |
Stage 6-8 (H)ITEM: n/a |
Enemies in this world:
Boyon,
Pass,
Pomori,
Terupyo,
 Maron, Maron,
 Ojin Ojin | |
Stage 7-1 (H)ITEM: Bomb Up |
Stage 7-2 (V)ITEM: 1UP |
Stage 7-3 (V)ITEM: Bomb Pass |
Stage 7-4 (H)ITEM: Detonation Switch |
Stage 7-5 (H)ITEM: 1UP |
Stage 7-6 (H)ITEM: Bomb Up |
Stage 7-7 (V)ITEM: Wall Pass |
Stage 7-8 (H) ITEM: n/a |
Enemies in this world:
Ballom,
Boyon,
Pass,
Pomori,
Terupyo,
Onil,
 Pontan Pontan | |
Stage 8-1 (H)ITEM: 1UP |
Stage 8-2 (H)ITEM: Fire Up |
Stage 8-3 (V)ITEM: Bomb Pass |
Stage 8-4 (H)ITEM: Detonation Switch |
Stage 8-5 (H)ITEM: Bomb Up |
Stage 8-6 (V)ITEM: 1UP |
Stage 8-7 (H)ITEM: Bomb Pass |
Stage 8-8     ITEM: n/a |
Because the manual only names a scant portion of the enemies, I'm left with the unfortunate task of - gasp! - having to cite a variety of sources! Names come from the Japanese manual, the Bombeman II manual, and the Bomberman Maniax guidebook. Names in brackets are from the English manual.
Ballom / バロム (Balom)Moves in a repetitive manner. Only changes direction upon hitting a wall. 100 points. |
Ekutopu / エクトプMoves erratically. 400 points. |
Boyon / ボヨンMoves aimlessly, but is willing to change direction randomly. 1000 points. |
Pass / パース (Parce)Will pursue Bomberman at fast speed. 2000 points. |
Pomori / ポーモリCan move through soft blocks. Moves aimlessly. 800 points. |
Terupyo / テルピョー (Telpio)Can move through soft blocks. Moves aimlessly. Faster than Boyon. 1000 points. |
Gacha / ガチャMoves aimlessly. 100 points. |
Onil / オニールMoves aimlessly. 400 points. |
Uotan / エクトプMoves aimlessly. 400 points. |
Boma / ボマBehaves like Ballon. |
Minvo / ミンボーBehaves like Ballom. 100 points. |
Bafa / バッファMoves aimlessly. 400 points. |
Flapper / フラッパーBehaves like Ballom. 100 points. |
Shashakin / シャシャキンMoves aimlessly. 400 points. |
Nagacham / ナガチャムBehaves like Ballom. 100 points. |
Korisuke / コリスケMoves aimlessly. 400 points. |
Maron / マロンBehaves like Ballom. 100 points. |
Ojin / オジンBehaves like Ballom. 400 points. |
Pontan / ポンタンCan move through soft blocks. Will pursue Bomberman at top speed. 200 points. |
Kondoria / コンドリアCan move through soft blocks. Moves aimlessly. Exclusive to Battle. |
Aron / アーロン (Arion)
Boss of Rounds 1 and 3. Pursues Bomberman, alternates between a slow and fast pursuit. When bombed its body segments change colour, from blue to yellow to red. Is defeated when made entirely red. 20000 points.
Bubbles / バブルズ
Boss of Rounds 2 and 5. Moves relatively aimlessly at first, deploying pink clouds ( ) that slowly pursue you (worth 100 points). Eventually the remaining clouds form a circle around him and he pursues Bomberman. Requires 2 hits to defeat. 20000 points.
Warpman / ワープマン
Boss of Rounds 4 and 6. Moves aimlessly and periodically teleports to a different location. Generates one-eyed blobs ( ) to pursue you which require 3 hits to defeat, though they are automatically destroyed once the boss is gone. Requires 3 hits to defeat. 30000 points.
Setsutore / セツトレ
Boss of Round 7. Moves aimlessly, periodically stopping to surround itself with a force field and spray fire. The fire travels in four directions for four tiles. Requires 3 hits to defeat. 30000 points each.
Black Bomberman / ブラックボンバーマン
Boss of Round 8. Begins the fight with an inpenetrable force field and four Bombermen backing him up - as long as the other Bombers are alive, he is invincible.
![]() The Bombers move aimlessly but will periodically turn into fireballs, shooting a projectile in four directions as they transform. They will pursue you if you get close, and will detonate any bombs on contact while fiery. They require 2 hits (in their normal forms) to defeat. 1000 points each.
The Bombers move aimlessly but will periodically turn into fireballs, shooting a projectile in four directions as they transform. They will pursue you if you get close, and will detonate any bombs on contact while fiery. They require 2 hits (in their normal forms) to defeat. 1000 points each.
After the four Bombers are defeated, Black's second pattern begins. He will move aimlessly, dropping bombs occasionally and usually in a line. His force field will periodically activate and deactivate, and he will sometimes teleport to another area of the map, where he will spray a four-tile reach of flames in four directions before walking. Requires 5 hits to defeat. 50000 points.
| RETURN TO GAME INDEX |
RETURN TO MASTER GAME LIST |
RETURN TO HOME PAGE |
| page last modified: 22/09/2012 | ||