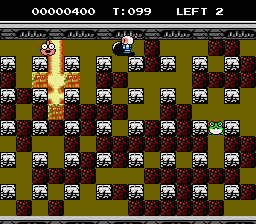
Bomberman II
Areas
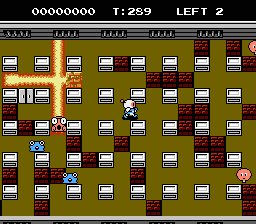
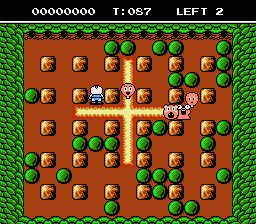
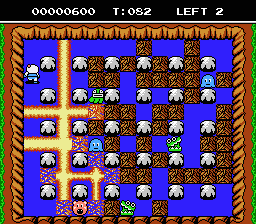
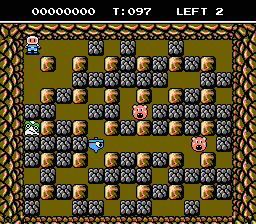
The only data I can provide for each stage are the enemies, the item, and the size of the stage. Stages marked with (H) are long stages with horizontal scrolling; if unmarked, it's a single-screen level. The time limit for regular and long stages is different.
World names come from the Japanese manual.
Area 1-1   ITEM: Fire Up |
Area 1-2    ITEM: Bomb Up |
Area 1-3    ITEM: Fire Up |
Area 1-4     ITEM: Remote Control |
Area 1-5     ITEM: Bomb Up |
Area 1-6        ITEM: Bonus |
Area 1-7      ITEM: Fire Up |
Area 1-8       ITEM: Remote Control |
Area 2-1    ITEM: Speed Up |
Area 2-2 (H)      ITEM: Bomb Up |
Area 2-3       ITEM: Fire Suit B |
Area 2-4 (H)       ITEM: Remote Control |
Area 2-5      ITEM: Bomb Up |
Area 2-6 (H)        ITEM: Bonus |
Area 2-7     ITEM: Fire Up |
Area 2-8 (H)        ITEM: Bomb Up |
Area 3-1    ITEM: Remote Control |
Area 3-2 (H)      ITEM: Fire Suit A |
Area 3-3 (H)      ITEM: Wall Pass |
Area 3-4 (H)        ITEM: Bomb Up |
Area 3-5      ITEM: Fire Up |
Area 3-6 (H)       ITEM: Bonus |
Area 3-7      ITEM: Remote Control |
Area 3-8        ITEM: Bomb Up |
Area 4-1    ITEM: Score |
Area 4-2      ITEM: Bomb Up |
Area 4-3 (H)        ITEM: Fire Suit A |
Area 4-4 (H)        ITEM: Remote Control |
Area 4-5       ITEM: Bomb Up |
Area 4-6 (H)        ITEM: Bonus |
Area 4-7        ITEM: Fire Up |
Area 4-8        ITEM: Bomb Up |
Area 5-1    ITEM: Fire Up |
Area 5-2 (H)        ITEM: Bomb Up |
Area 5-3 (H)      ITEM: Remote Control |
Area 5-4      ITEM: Fire Suit A |
Area 5-5 (H)        ITEM: Bomb Up |
Area 5-6 (H)         ITEM: Bonus |
Area 5-7        ITEM: Bomb Up |
Area 5-8 (H)        ITEM: Bomb Up |
Area 6-1 (H)        ITEM: Remote Control |
Area 6-2 (H)        ITEM: Wall Pass |
Area 6-3 (H)        ITEM: Bomb Up |
Area 6-4 (H)        ITEM: Fire Suit A |
Area 6-5 (H)        ITEM: Fire Up |
Area 6-6 (H)        ITEM: Bonus |
Area 6-7 (H)        ITEM: Bomb Up |
Area 6-8 (H)        ITEM: Fire Up |
Ballom / バロムMoves in a repetitive manner. Only changes direction upon hitting a wall. 100 points. |
Boyon / ボヨンMoves back and forth erratically. Can travel through soft blocks. 400 points. |
Terupyo / テルピョーFaster than Ballom. Moves aimlessly, but will pursue Bomberman when close. 200 points. |
Nagacham / ナガチャムMoves aimlessly. Can travel through soft blocks. Will periodically teleport to another part of the map. 200 points. |
Pass / パースFaster than Ballom. Will pursue Bomberman if nearby. 400 points. |
Pomori / ポーモリMoves slowly and aimlessly. Can pass through soft blocks. 100 points. |
Pontan / ポンタンBehaves like Ballom, but a little faster. 200 points. |
Flapper / フラッパーBehaves like Ballom. 400 points. |
Bafa / バッファBehaves like Boyon. Can pass through soft blocks. 400 points. |
Ojin / オジンMoves slowly and aimlessly. 1000 points. |
Ekutopu / エクトプMoves aimlessly. Can pass through soft blocks. 400 points. |
Gacha / ガチャMoves aimlessly. Will pursue Bomberman on sight. 1000 points. |
Uotan / ウォータンMoves two tiles at a time before pausing for a second. 400 points. |
Boma / ボマBehaves like Ballom, but faster. Will transform into a bomb roughly every 9 seconds; it has a 5-tile blast radius and is invulnerable while in bomb form. 400 points. |
Korisuke / コリスケBehaves like Ballom. Is the fastest enemy in the game. 1000 points. |
Maron / マロンMoves slowly and aimlessly. Will periodically charge in one direction at a faster speed, unable to turn until it hits an obstacle. |
| RETURN TO GAME INDEX |
RETURN TO MASTER GAME LIST |
RETURN TO HOME PAGE |
| page last modified: 24/10/2012 | ||
