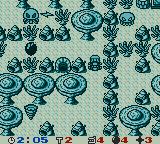
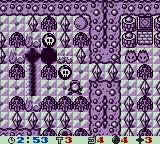
Bomberman GB 3
gameplay
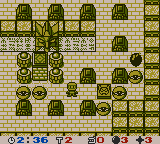 The goal of each stage is to open the exit, which is accomplished by a unique objective in each round, ranging from defeating all enemies, collecting key items, or basic puzzle-solving.
Some rounds are split into two screens; the timer is reset upon entering them, and they serve as impromptu checkpoints, restarting here should you lose a life.
The stage select offers a choice of three stages to enter in any order you want. Once the three stages are cleared, you will progress to the second set of three stages, and after that, the final stage.
You are given 3 minutes to complete the objective and reach the exit. If time runs out, you lose a life and must redo the level.
If you lose a life, you also lose a power-up, alternating between Fire Up and Bomb Up with every death. Once all lives are lost, it's game over, and you are granted a password. Passwords will retain your special item purchases and Bomber Capsule stock.
A boss is encountered on every six round. After defeating the boss, you are awarded Bomber Capsules and can access Honey's shop, where you can spend those Capsules on special items or Motobombers. Motobombers act as extra hit-points, and provide additional abilities while they are in use. See Special Items for details.
There are 7 stages with 6 areas in each, making for a total of 42 levels, some with multiple screens.
Challenge Mode
Details on the Challenge Mode can be found here.
Controls
| BUTTON | ACTION (gameplay) | ACTION (menu) |
| Control Pad | Move Bomberman. | Move cursor. |
| A Button | Lay a bomb. Double-tap to use the Line Bomb. | Accept. |
| B Button | Stop a kicked bomb. Hold to Dash. | Cancel. |
| START Button | Pause game. | Accept. |
| SELECT Button | n/a | n/a |
Bomb Up / ボムアップ
Increases number of bombs that can be laid on-screen by 1. Maximum of 4.
Fire Up / ファイヤーアップ
Increases bomb blast range by 1 tile. Maximum of 4.
1UP / ワンアップ
Grants you an extra life.
Timer / タイマー
Freezes the timer, enemies and traps for for 8 seconds.
Skull / ドクロ
Alters Bomberman's speed for 10 seconds, either making him slower or faster for the duration.
Crystal / クリスタル
Found in every fifth round. Collecting a set amount will spawn item panels by the exit: 40 Crystals spawns a 1UP, 50 Crystals rewards a Bell Panel, and 60 Crystals rewards a second Bell. The number of Crystals collected is saved if you lose a life on the second screen of a round.
 Bell Panel / ベルパネル
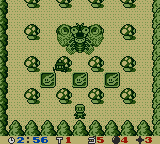
Only found by collecting 50 or 60 Crystals. When collected, this item will take effect at the start of a boss battle, spawning one or two Bomber Balls: one Bell Panel will spawn a random set of 3 Bomb Up and Fire Up panels at the start of the fight, while the second Bell Panel will deal one point of damage to the boss.
Bomber Capsule / ボンバーカプセル
Awarded after defeating a boss. Used to purchase items from Honey's shop after completing a stage.
After defeating a boss, you can access Honey's shop and purchase permanent special items; these are always active and are not lost after losing a life.
Bomb Kick / ボムキック
Walk into a bomb to kick it forward; press the B Button to stop it early.
Cost: 1 Capsule
Dash / ダッシュ
Hold the B Button to increase Bomberman's movement speed.
Cost: 1 Capsule
Line Bomb / ラインボム
Press the A Button twice to lay all bombs forward in a row.
Cost: 1 Capsule
Full Power / フルパワー
Bomberman automatically begins each round with maxed-out Bomb Ups and Fire Ups.
Cost: 7 Capsules
Motobombers can be selected at the start of each round (and after warping to the second screen), and behave similar to Louies or animal steeds, serving as an additional hit-point and sometimes boasting special abilities. If a Motobomber is destroyed, it will be inaccessible until the round is completed.
Motobomber Mk. 1 / モトボンバー1号

No special abilities.
Cost: 1 Capsule
Motobomber Mk. 2 / モトボンバー2号

This vehicle can jump over one hard block.
Cost: 2 Capsules
Motobomber Mk. 3 / モトボンバー3号

Holding the B Button and colliding with a soft block will destroy it. Soft blocks destroyed in this manner will erase any item panels they may have contained.
Cost: 2 Capsules
Motobomber Mk. 4 / モトボンバー4号

Hold the B Button to speed up, moving faster than even the Dash. This vehicle can survive 2 attacks before being destroyed.
Cost: 3 Capsules
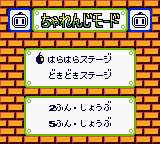 Challenge Mode is a timed score attack mode, where the goal is to complete the stage and defeat Devil Bomber while amassing as high a score as possible. This entails collecting bonus items, defeating enemies, and clearing the stage as quickly as possible; the point table for items and enemies can be found below. You are awarded one of four ranks depending on your final score.
You cannot pause during gameplay in this mode, for some reason.
There are two stages available, each with unique challenges, and the option to play with a 2 Minute or 5 Minute timer. The choice of time limit increases the score requirements for all rankings.
You are given the option of three item loadouts:
TYPE 1: Bomb Kick + Dash + Line Bomb; ideal for tactical play, taking advantage of bomb positioning.
TYPE 2: Motobomber Mk. 3 + Dash; optimised for quickly clearing through soft blocks, at the expense of item panels.
TYPE 3: Motobomber Mk. 4; Bomberman takes three hits before dying, allowing room for mistakes.
 50 |
 100 |
 100 |
 2000 |
 200 |
 300 |
 400 |
 5000 |
When the timer reaches 1 minute, pressure blocks will rain down, filling tiles top-to-bottom, left-to-right; they fall so slowly it can only fill the five left-most columns before the timer expires. Pressure blocks do not appear during the boss battle. Once time runs out, the game is over.
Your score is graded when the game is over, whether Bomberman is defeated or the stage is completed.
Soft blocks have been omitted for clarity. See enemies for enemy behaviour.
Harahara Stage / はらはらステージ
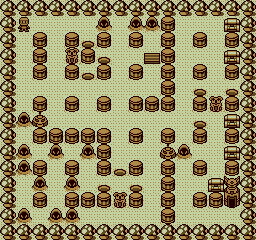 |
ENEMIES: Mogura Trap x 3, [drone] x 2
This stage is dense with soft blocks, making it tough to explore in-depth in 2-Minute mode. |
Dokidoki Stage / どきどきステージ
ENEMIES: [drone] x 3
This stage is unique in that it has multiple paths you can take to the boss: there are three warp pads in the starting area in the top-centre, top-right and bottom-right. All of these areas all lead to the same boss fight with Devil Bomber. | |
ENEMIES: [spider] x 2
This is the top-centre path. | |
ENEMIES: [bat] x 2
This is the top-right path. | |
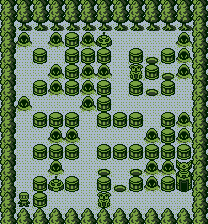 |
ENEMIES: [drone] x 2, Mogura Trap x 2
This is the bottom-right path. |
Vs. Devil Bomber
Devil Bomber will fly to Bomberman's then-current position, landing and launching four orbs to 2 tiles diagonally from his position that move vertically to the edge of the screen. Devil Bomber is only vulnerable once he has landed.
|
Ranking
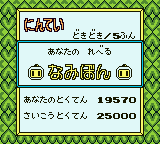 Bonus points are awarded only upon completing the stage; if you lose, no bonus is awarded.
Time remaining (のこりじかん): 50 points per second on the timer.
Destroyed blocks (こわしたぶろっく): 30 points per soft block.
Defeated enemies (たおした てき): 80 points per enemy.
| Useless ぺけぼん |
Beginner みそぼん |
Average なみぼん |
Professional ぷろぼん |
|
| Harahara 2-Min | 0 ~ 1500 | 1500 ~ 3999 | 4000 ~ 8999 | 9000 + |
| Harahara 5-Min | 0 ~ 3000 | 3000 ~ 7999 | 8000 ~ 17,999 | 18,000 + |
| Dokidoki 2-Min | 0 ~ 3000 | 3000 ~ 6999 | 7000 ~ 13,999 | 14,000 + |
| Dokidoki 5-Min | 0 ~ 3500 | 3500 ~ 7999 | 8000 ~ 24,999 | 25,000 + |
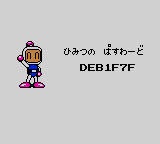
Bomberman GB 3 does not use the standard four-number password system the series otherwise sticks with, but instead a seven-character hexadecimal system to accommodate the sheer number of variables: completed stages, purchased upgrades, and Bomber Capsules.
For custom specifications, you can use the password generator at Kyozo Kosho Aratame Mk. II.
 Boss rush
This password is revealed after the staff roll. Entering it will pit you against all of the game's bosses in a row (barring the Devil Bomber clone fought in 7-3), equipped with 6 Bomb Ups and 6 Fire Ups. The only reward for clearing it is a screen grading you a "Professional Bomber".
| RETURN TO GAME INDEX |
RETURN TO MASTER GAME LIST |
RETURN TO HOME PAGE |
| page last modified: 16/10/2019 | ||
