
Round 3
Round 3-1
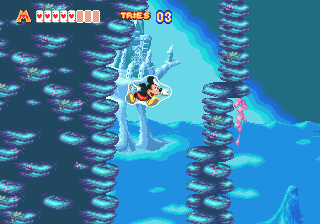
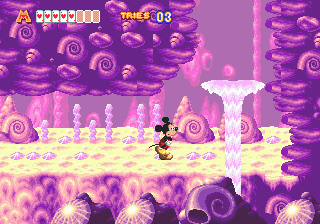
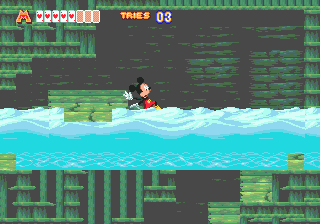
Here we are in the underwater level, and there are some interesting design changes, but not much else of interest. Your movements seem slower and clunkier in the beta, compared to the final's slightly more smoother and flexible bubble. There are absolutely no spikes to be found here, and some parts of the background are missing water effects; the area above the first "tunnel" is missing a wall and is lower down, the areas are swapped around, with the right path being a dead end (left in the final), and left the correct way.
The "correct way" lasts a while longer until you find the upper path, and the area above the bottom part has a much larger area to go down and up again to continue on your way, with four fish to torment you. The exit leads you straight to the next area, while the final includes an area of breathing space, where you simply swim into a cave before you head onto the next area.
Round 3-C
And this is the entrance of the cave. Considering it's so ridiculously short and pointless, the design is the same, although some of the tiles are different. Interestingly, as you approach the end of the tunnel, the whole area shakes for a few seconds, then settles again. This only happens in the final's 2-Player mode where pulling Donald out under the gap causes the whole temple to rumble and collapse, but it happens with any mode in the beta.
Round 3-D
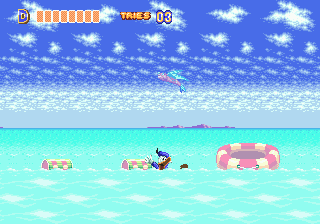
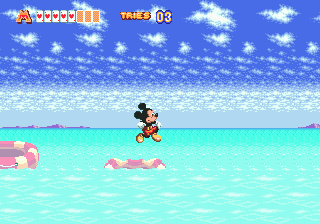
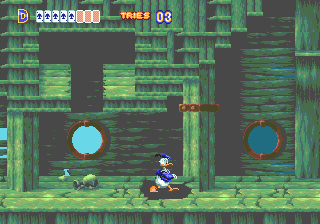
Because Donald has got such a big fat ass, he has to swim to the surface and go here, since he can't fit underneath the gap in the previous area without the aid of Mickey.
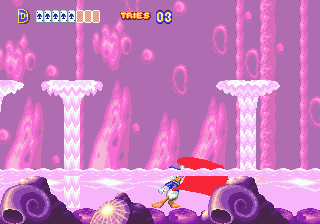
And there isn't a lot different here. The fish have totally different sprites and colours, the rubber rings are also different, and they deflate differently, the weird floating can things are also differently coloured, and one of the islands is missing a tree. Most importantly, the music is totally different! The beta has a totally unfitting remix of the sunken ship's theme, while the final has typical beach music. The remix is actually pretty cool, making the tune sound less creepy and more mysterious, but it's totally unfitting for the beach, and I'm glad they changed it.
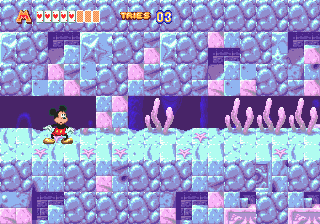
Round 3-M
And here's the cave. Not much different here; some platforms and slopes are mildly different in height and pattern, some details and enemies have their positions adjusted, the water doesn't overlap your character (although the surface of it does), and when you leave, your character doesn't Alakazam themselves a bubble before leaving.
Round 3-P
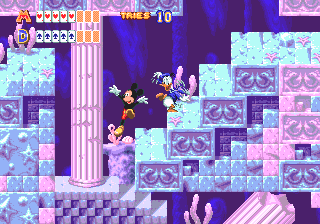
The 2-Player area takes place in the ruined temple, and like just about everything else here, it looks no different from the final, although it's missing a number of things and some details are altered. The background is slightly different, the platform after the stairs are another set of stairs here, and after the tiny column it's a long drop, compared to the final where there's a platform before you drop to the low area. The area around the large stairs and the stairs themselves have slight modifications in details, and after that section, it's nothing but an incredibly, incredibly long walk. Words can't describe how disgustingly long it is. It just goes on, and on, and on. This is because in the final, you hitch a lift on a seashell car that drives you just about all the way and smashes all the pillars holding the ceiling, and the rest of it is running out from the collapsing temple. The beta lacks all those things, so you just walk and walk and walk. EXCITING!!
Round 3-C
Yeah, there are two areas in this level labelled 3-C. Zany.
So here's the final area for this level. It starts off with some breathing space again, where you swim an obscenely long distance into another cave which somehow leads you into a sunken ship; the final has a more appropriate area, where you simply swim to the other side of the screen into a sunken ship.
And now there's the sunken ship, where immediately there are differences: There are more cracks in the floor boards than usual, there's an area in the ceiling that can be reached with a team-mate jump (but has no purpose due to lack of items), the background is the second porthole is shifted a little to the left, and so is one of the pillars. Up the stairs, the sceptres are placed lower, and past them you can't drop down the right side of the lower stairs because of a wall. Down them, past the sharks, and up the right stairs, you can simply walk down the first part of the tiny stairs (whereas in the final you have to crawl down all of it); water then seeps in and submerges that tunnel, but no door closes behind you, and the water also covers the top part of the stairs you have to go down. The bottom of the stairs features another area in the ceiling, and the stairs are further from the ground, thus allowing you to walk under them instead of crawling.

And now it's the boss! Sadly, the only difference I saw was that the shark can only be hit twice while he's chomping along the ground; after the second hit, he's invincible until he goes back under the floor boards or off-screen.
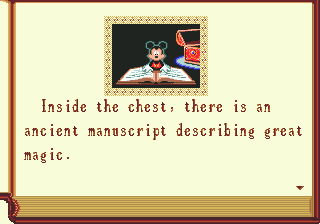

We get a manuscript this time, but it's two levels too late; it's part of the Round 1 manuscript! It's also entirely different from the final text for it, and the image is from the intro story. Also, after the manuscript is read, you're simply dumped into Round 4, while in the final, you leave the sunken ship and are whisked out of the top, and appear in Round 4 leaping out of a fish bowl. Neat.
![]()