This walkthrough is written by Rage Quitter 87.
The final "proper" mission of Metal Slug Advance has you attacking the enemy's base with a air attack. Once inside you will have to survive in a maze or rooms and corridors until you find the boss.

This walkthrough is written by Rage Quitter 87.
The final "proper" mission of Metal Slug Advance has you attacking the enemy's base with a air attack. Once inside you will have to survive in a maze or rooms and corridors until you find the boss.
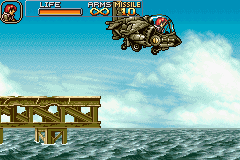
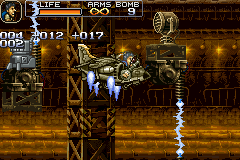
Well, this part is simple. Just jump into the Slug Flyer right in front of you and you will automatically take off and go onto the next part. And yes, if you jump into the water, you will die. Actually, if you have not got Card 085 Washout yet, I would recommend getting it now by simply jumping into the water, then selecting go back to camp, and you will get the card.
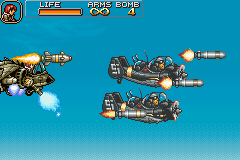
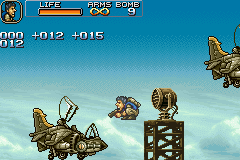
You'll now be in a sky battle. Enemy planes will come on screen and attack you by launching missiles at you, avoid or shoot them. When you shoot at these planes they usually go to the top left or bottom left side of the screen where you cannot hit them and then launch missiles at you, move around and they will move so you can start shooting them again. After wasting a few of these enemies, a few enemy troops with rocket launchers will fall parachute down, shoot them down before they have the chance to shoot at you. Then you will face more enemy planes, and after destroying a few more of these a small enemy helicopter will appear, destroy it to end this part of the level.
[1] You can still use the Slug Flyer for all of this part of the mission until you reach the end of this part or it gets destroyed. Go to the right and you will see a spiked enemy tank, destroy it and keep going right. You'll now be at a platform, and you can either go above it or below. On the below level there is another spiked tank, on the top there are a few enemy soldiers and a super grenade weapon. Kill the enemies then destroy the box on the platform to reveal an Enemy Chaser, collect it.
[2] Continue to the right and eventually you will come across a few rocket launcher enemies and a homing missile launcher, take out the soldiers first then destroy the launcher. You can destroy the missiles the launcher sends at you by the way. After the first one is gone, go a bit more to the right and there is another one, blow it up.
[3] Keep going right and you will meet a enemy tank and a few soldiers, destroy them all quickly and use a couple of missiles on the tank if you wish. Keep going right and you will see a platform above you with two enemy tanks on it and a gas power up in between them. Take out the tanks then get the gas, then continue right. There will be a homing missile launcher at one point, and then after that a few enemy troops who need to be taken out. Keep going right until the screen locks.
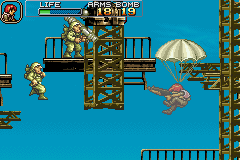
[4] At this point enemy troops will parachute down with rocket launchers. My advice is to get out of the Slug Flyer (if you still have it) as on foot you have more room to move. Shoot down the soldiers, and once the screen lets you move again, get back in the Slug Flyer (again, if you have it that is) move up and shoot the box and collect the grenade power up.
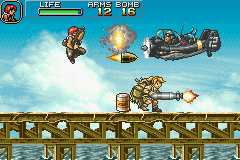
[5] Keep going right and eventually the screen will lock once more as an enemy tank and small helicopter appear. Destroy the tank first and then take out the helicopter. Once they have both been dealt with, the screen will unlock and you can move onto the next section. Please skip the next section on route 2 and go to PART 3.
To get on this route, you must let the Slug Flyer be destroyed or simply press L while on Route1a.
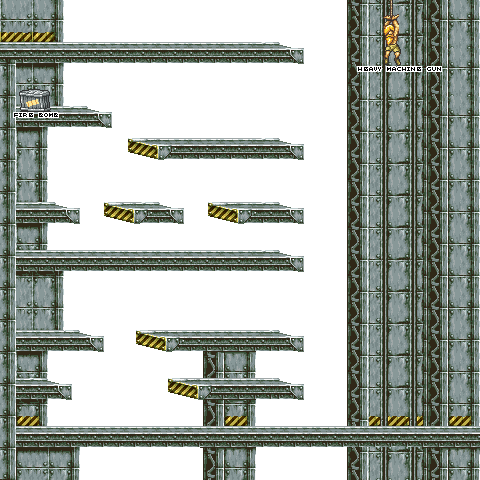
 You will be parachuting downward and you will face multiple enemies who try to shoot you. If they do hit you, your descent will quicken for a brief moment. Shoot down the soldiers and collect some weapons as weapons such as the Shotgun and Heavy Machine Gun are on offer here, and grab the food items if you're low on health.
Also look
out for an enemy tank at the near bottom of this section, as well as a few homing missile launchers. One other thing to watch out for are lightning rod type things. When they are flashing blue, don't go down the middle, just move to the side and you won't get hurt. When you reach the bottom of the level, you will be on foot again and need to proceed right to end this part of the mission and move onto the next.
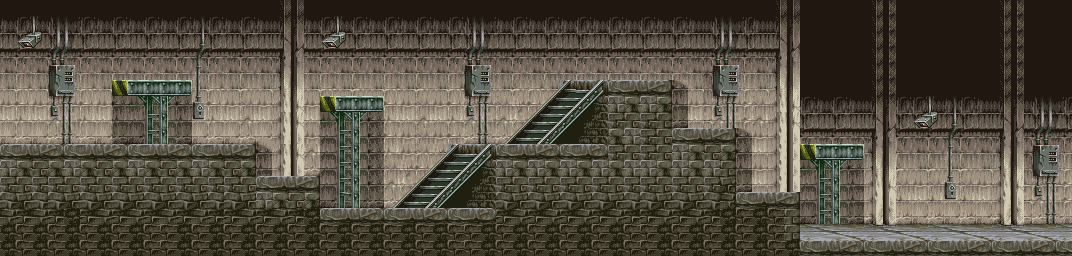
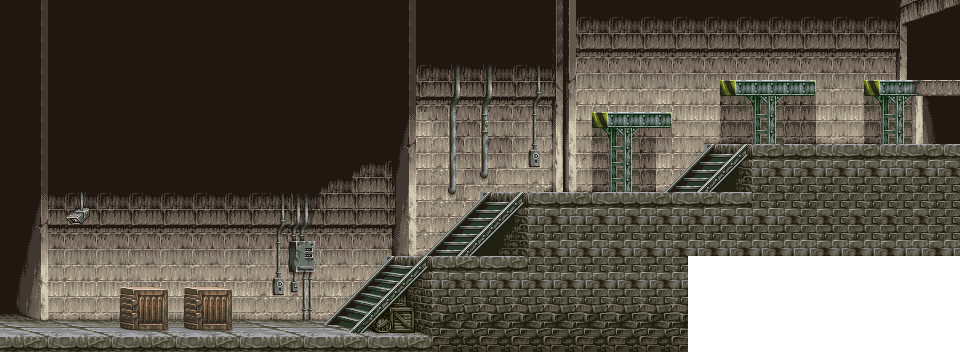
[1] You will now appear on the enemy docks. Proceed right and you will see an enemy tank and a few soldiers, if you have the Shotgun from the last section still these will not pose a problem. In the box next to the tank is a Super Grenade. Continue right and some enemy planes will appear and launch a missile each at you, either shoot the missiles or avoid them. Watch out for enemy troops in this section who attack you.
 [2] Continue right until the screen locks. Enemy soldiers will now appear with rocket launchers, and a few will parachute from the sky. Kill them before any of them can fire off a shot, and then move right when the screen unlocks. In the box you see there is another Super Grenade. Jump across a few platforms but watch out for divers who jump out of the water, who will throw a missile at you unless you kill them before they have a chance to do so. Keep going right and eventually you will see a spiked enemy tank, shoot at it with the Super Grenade to destroy it quickly.
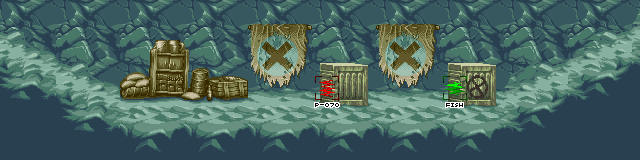
[3] Continue right and another spiked tank will appear, as well as tied up prisoner (075). Destroy the tank and then save the prisoner, who will give you a fish. Jump to the next platform but watch out for enemy planes and soldiers. Rumi, who is a supply girl in most of the Metal Slug games, will be there. Shoot at her to make a hole in her backpack and some food items will drop out. After three have fallen out, she will run off and you can go onto the next section. Rumi will not count on your prisoner rescue list.
After the second part of route 1 or 2, you will arrive inside the enemy base. This is where it gets confusing, mainly because there are many routes in this part of the mission. What I am going to do is offer three ways of going through the mission. Basically, you'll have to play through this mission three times to get everything, so each time you do choose a different route. If you find this a little confusing, here's a greyscale image map that shows where every path leads.
Move right and you will see a box and beyond it are a few enemy soldiers who try to attack you, including one soldier on a platform above you. Throw a couple of grenades to deal with them. A tank will also roll on, destroy it with a few grenades. On the platform above the tank there is a box with a rocket launcher weapon inside. Collect it and then go onward and you will see a few more enemy troops, kill them and then you can either go up or down.
Go UP.
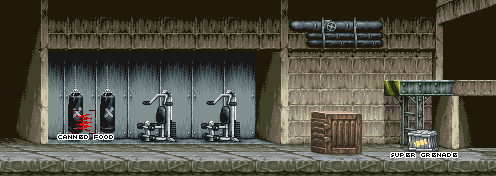
You'll now be in some kind of gym. In front of you are two enemies, one with a shield and one with a sniper rifle. Toss a grenade to kill both of them. Move slightly forward and four enemy soldiers will drop down and start throwing grenades, kill them quickly. After they are all dead, shoot at the punching bag on the left (it has an X on it) and prisoner (072) will drop out, save him for some canned food.
After doing this move right and you will see another box with a rocket launcher soldier on it. Kill him then jump over the box and go next to another rocket launcher soldier, kill him then take out the other soldier above you. Once again you can either go up or down, go UP.
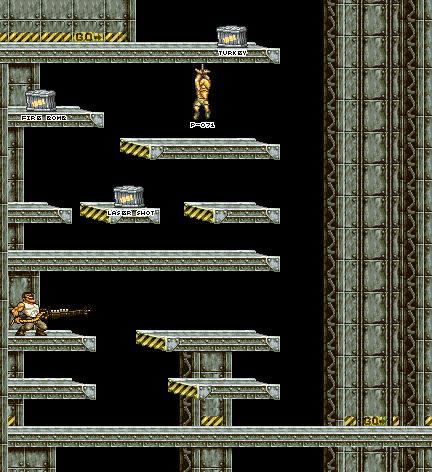
In this small room an enemy tank will approach you, shoot it (you should still have some Rocket Launcher ammo left) and then free the prisoner you can see behind where the tank was. This is prisoner (065) and he will give you aturkey. Another tank will appear from the left and a enemy soldier will drop down, destroy them both. Now go to the left of the screen, and look up at the box and barrel above you. Shoot at the box first and prisoner (064) will drop down, he has a Laser Shot for you. Now shoot at the barrel andCard 055 Dungeon will drop down. Exit this room and go DOWN.
From here, just keep moving right taking out enemy troops as they come. The Laser Shot should make short work of them. You can get yourself a Super Grenade if you want, it's in the box on the platform you see as soon as you enter this section, but I would stick with the Laser Shot.
When you get to a flight of metal stairs, look up at the camera above you. Shoot at it and Card 006 Black Hound will drop down, be sure to collect it. After doing so climb the stairs and continue right, a spiked tank will come into view. Destroy it with the laser shot, then move right until you go into another room.
Shoot the two soldiers you see as soon as you enter this room. The screen will lock as more soldiers drop down above you, kill them. A couple more firework throwing soldiers will come on, duck to avoid their attack and kill them both. On the map in the background there are two blinking dots. Shoot at the first one and Card 019 H.Machn Gun+ will drop down. Shoot at the other blinking dot and prisoner (068) will drop down, who has a Heavy Machine Gun to give you. The screen will be unlocked at this point, so you can go right onto the next section.
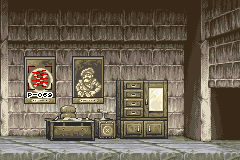
You will now be in another room. There are two pictures in this room, one with an X on it and one with a picture of General Morden. Shoot at the one with the X to get prisoner (069) who will give you Card 021 L.Shot+. Shoot at the book case at the right of the screen to destroy it and reveal a hidden passage way, but first a few enemy soldiers will come out, kill them and then move right to the next part of the mission.

In this small room there is an enemy spiked tank in front of you. Shoot at it with the heavy machine gun or maybe toss a few grenades to destroy it quickly. Once destroyed, the remains of the tank will stay there, shoot at the ground where the tank is to reveal Card 023 F.Shot+, collect it, then move on to the next room.
In this room you will have to make your way down a small slope until the ground becomes level again. Some soldiers will appear from no where and leap about trying to knife you, avoid their attacks and shoot them. When you see a box, shoot at the left side of it to reveal prisoner (070) who will give you an ammunition clip. Jump over that box and a few more troops will attack you, kill them, then shoot at the left side of the next box you see to reveal a fish, which is great if you aren't at full health at this point. Jump over this box and continue right to go to the boss of this mission.
Go DOWN.

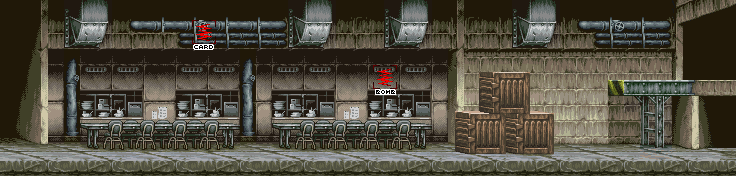
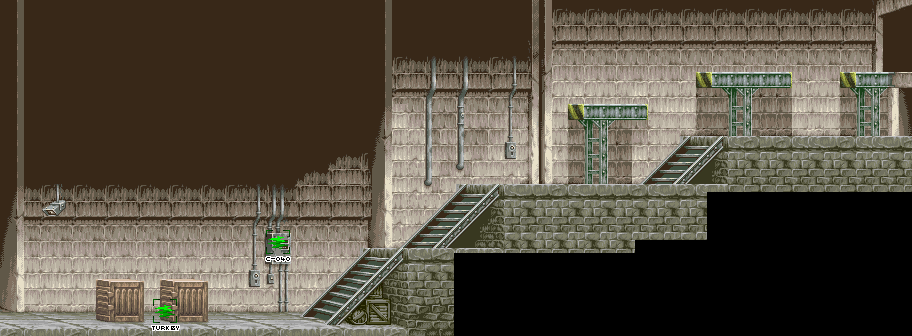
The start of this room seems to be some kind of kitchen or dining hall. Move right and kill the enemies as you go. Beware of the snipers who usually duck and fire. When you see a lot of boxes with a soldier on top, look a bit to the left. There is a large table with four chairs. One of the chairs has no backing. Move to that one, aim up and shoot and prisoner (067) will drop down, save him for some grenades. Now jump over the boxes and kill a few soldiers, and you'll see an enemy tank. Move beneath it and then shoot it from below, be carefully to avoid it's shots but most of the time you are out of it's range. You can now either go up or down. Go down.
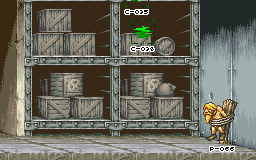
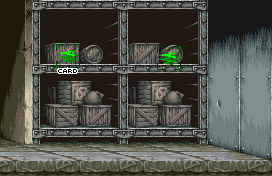
In this small room there is a spiked tank and a prisoner behind it. Destroy the tank with some grenades, then free prisoner (066) who has Card 012 F.S. Clip. Now shoot at the crates above you until one of them makes a noise like it is getting hit. Card 038 Hyper Cannon will drop down and fall on you. Keep shooting and then Card 035 L.4 Armor will drop down, collect that too. Then go back out the way you came, then go UP.
In this room, keep moving right and kill as many soldiers as you can. At one point, the screen will lock and you will have to fight a few soldiers and a tank, use grenades on the tank. Keep moving right and you have another choice: either up or down. Go DOWN.
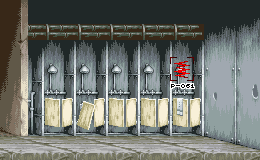
In this shower room you will first see two enemy soldiers talking, you can kill them before they see you. Once they are dead, more soldiers will drop down, kill them as well. When they have all been killed, one lone soldier will appear at the left of the screen and throw a firework at you, sometimes you can kill him before he has a chance to do anything if you are quick enough. Once he is dead, go to the shower nearest to the right of the screen, aim up and shoot until prisoner (061) appears who has a Drop Shot for you. Leave this room and take the room UP above you.
Move right in this larger room and take out any enemy soldiers that appear. When you get to a flight of stairs, climb them and then stop at the top, aim up and shoot at the camera above you to get an Iron Lizard to fall down, take it or leave it. Move right and the screen will lock as a tall enemy tank appears, destroy it and watch out for enemy troops above you. Once the tank and troops are gone, the screen will unlock and you can move right again. Keep going right until you see a platform and a tank. Quickly jump up on the platform, then jump up to the left and move left until you see a box, shoot it to get Card 039 Thruster+. Now go back the way you came until you see the tank again, destroy it, then go DOWN.*****
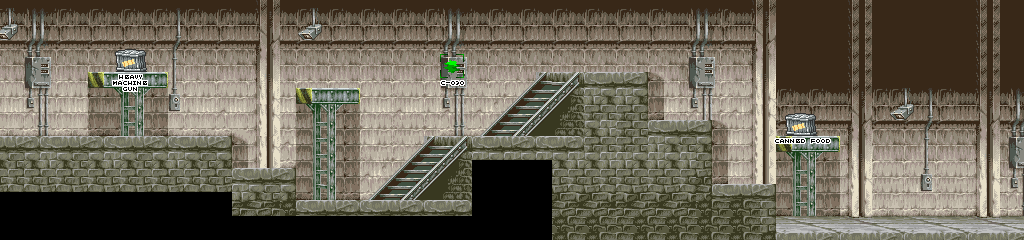
Move right and shoot the box for a Heavy Machine Gun. Keep moving right killing enemy troops until the screen locks. At this point lots of those bomb rolling enemies will appear, kill them until no more show up, then the screen will unlock and you can move right again. Shoot the fuse box for Card 030 Demon God and climb the stairs; you'll see a tank that you will need to destroy, then keep going right and down the large steps. Shoot the box for some canned food. You'll see another tank, but you can avoid it if you want and go right to proceed to the next section.
The box in front of you has a turkey inside it. I would save it and use the lift to get back up here and collect it after you have fought Allen Jr. Jump off the ledge and hold left to land on the platform with the prisoner tied up on it. This is prisoner (071) who has a Heavy Machine Gun for you. Go left and jump to the platform with the box on it and shoot it to get some fire bombs, but collect them quickly or the tank underneath this platform will shoot you. Now drop a level to the same level as the tank and move right and shoot the other box for a Laser Shot. I'd actually save this for the proper boss, so like the turkey leave their boxes untouched and come back later to collect them.
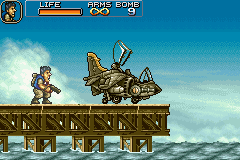
Now drop down another few levels and move left. The screen will lock and Allen Jr will appear to fight you. He moves around quickly and will try to shoot you with his heavy machine gun. Don't get close to him or he will slash you. If that wasn't enough he has an infinite supply of grenades to throw at you. Just keep jumping around and shooting and he will fall, but then get back up.
He will now try to cut you apart with his sword, so use the same tactics as before to kill him proper. Once he is dead, you will get Card 077 Allen Jr. The screen will now unlock, move to the right and take the lift up to collect the turkey and laser, then go back down and go right to face the boss of this mission.
For this route, follow route 2 up to the point where I put *****. Instead of going down this time, go UP.
You will appear in a large room, go right and jump between the two boxes you can see. Shoot at the left side of the second one for a turkey. Now jump over the second box and you'll see a large box on the wall, shoot at it and Card 040 A.P. Cannon will fall out. Now climb the two sets of stairs, at the top of the second set is a tank, move close to it and destroy it as it cannot hurt you in this position. Go onward until you have a choice; you can either go up or down. Go DOWN.
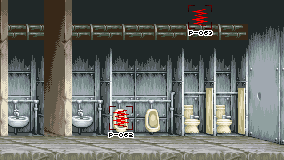
In this toilet room, there are four blue soldiers who all act surprised when you come in and you can shoot them before they even have time to lob their grenades. After doing this a few more soldiers will drop down above you, so be alert. Once they are all dead, shoot at the left urinal in the room to reveal prisoner (062) who will give you a fish, then go to the third toilet, aim up and shoot and prisoner (063) will drop down, save him to get Card 009 R.L. Clip. Exit this room and go UP.
As soon as you enter this room, there is a camera right above you. Shoot at it and Card 031 Flak Jacket will drop down. Continue right and you will have a lot of platforms to jump with enemies on motorbikes to avoid, but they aren't that hard to avoid. There also many enemy troops around this section, make sure to kill them as they can get in your way as you jump around. When you are at the top you will see a Metal Slug, get in it and continue forward to the next area.
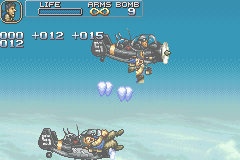
When you enter this area, kill the two soldiers then shoot at the camera and Card 073 Fio will fall down. Collect it and then continue right up some stairs, at some point the screen will lock and a large enemy sub will drop down. Shoot at it but watch out for grenade tossing troops from behind you. After the sub is destroyed, the screen will unlock so move right and go up more stairs until you see a spiked tank. Destroy it and the move right to the next area.
Go right to a funny set of metal slabs and enemy troops will attack you. It can be hard to not take a hit here but try to take all the enemies out quickly. Proceed right and you will pass some jail cells, keep going right and eventually another spiked tank will come into view, with two tied up prisoners above it. Destroy the tank and then free the prisoners. Prisoner (073) has a Rocket Launcher for you, whilst prisoner (074) has a fish. After saving both of them, go right to end this section and go onto the boss of this mission.

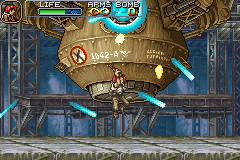
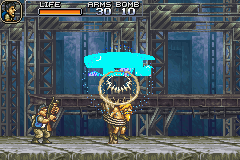
Cabracan is the final boss of Metal Slug Advance and is, at it's most basic, a big brown ball. It only has one weak spot, which is the red circle in the centre of it. When you first enter this boss stage, you will drop to the bottom with some platforms.
Jump up the platforms and then start shooting the red part. After a few seconds the red part will shield itself and the Cabracan will launch some droids at you which fire lock on shots at you. Shoot them to destroy them. When you destroy the second one, it will drop a Heavy Machine Gun for you but it vanishes quickly so collect it as quickly as possible.
The next weapon the Cabracan has is to fire blue balls from underneath it which rise upward. Duck in either the bottom left or bottom right of the screen and they will not hit you.
Now the Cabracan will fire a super laser, stay in the bottom left or right corner to avoid it. The laser fires in the middle and brings down all the platforms. The Cabracan will now move down and start firing bouncing blue lasers everywhere, but you can start shooting the red part again. Move carefully whilst shooting the red part. After a while the Cabracan will rise up out of range, but then the platforms will drop again. Jump up them and this process of Cabracan attacks will keep repeating.
Once you have done enough damage, the Cabracan will have flames all over it and use more droids at you when it launches them. It also gains a new attack where it fires blue lasers in a circle, stand directly underneath the Cabracan and you should not be hurt by them. Keep blasting the red part and eventually the Cabracan will fall and you will have completed the game.
On hard mode, the droids move faster. Also, the blue bouncing lasers move MUCH faster when the Cabracan is on fire and are very, very difficult to avoid. One other thing is that the blue balls which rise upward have more chance of hitting you if you are not in the bottom left or right corners, as they cover more of the arena than usual.
To destroy this thing quickly, you will certainly need the Black Hound, Hyper Cannon, Hyper Vulcan, Thruster+, L.5 Armor and perhaps the A.P. cards before attempting to fight this boss. As soon as the boss fight starts, jump up to the top left of the screen, then hold down the B button whilst jumping and firing shells at the Cabracan. Once you have no shells left, hold down so you can throw grenades from the slug by pressing R. A few grenades will destroy it quickly. Basically, to get the card this boss has to die before it has a chance to fire its platform destroying super laser.
Click maps to enlarge them.

(final)
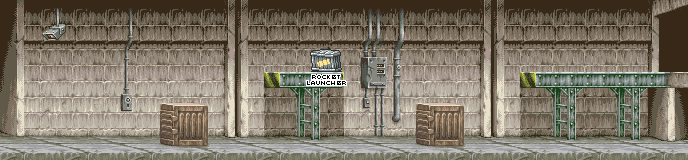
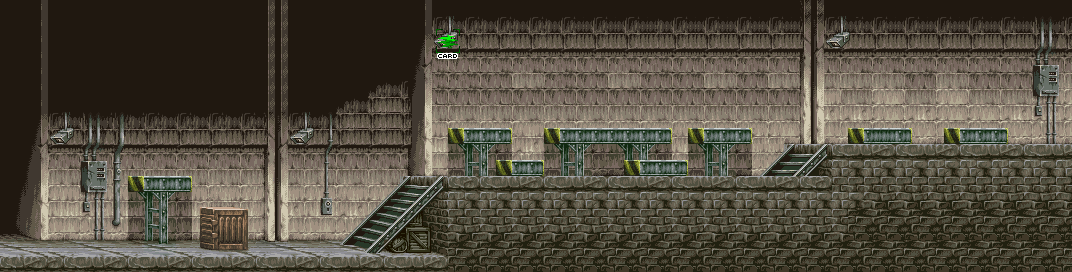
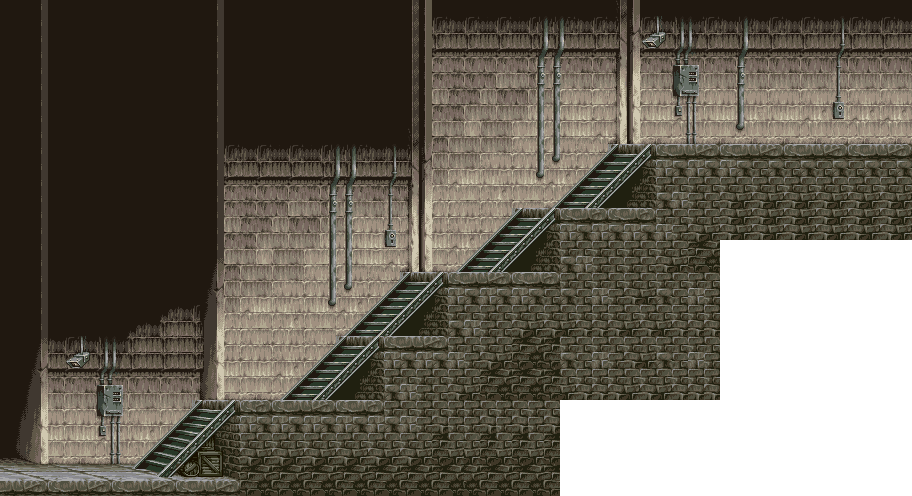
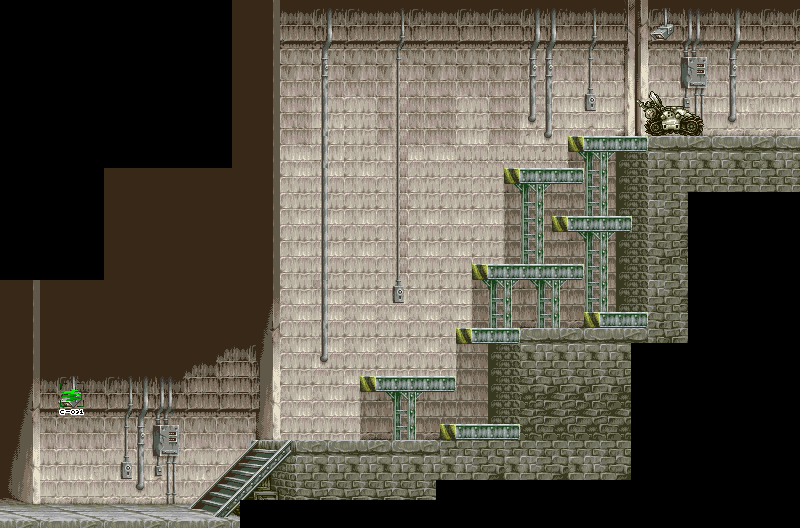
By default, the Slug Flyer sequence is inaccessible, and selecting Mission 5 from the menu will put you inside the base, skipping even this section -- walking to the right from Mission 4's boss will put you at the bottom of this screen, which you'd normally access by bailing from the Slug Flyer.
The electricity pylons are not animated and cannot interact with you. The scaffolding was made to overlap the platforms in the final for some reason, but is otherwise identical.
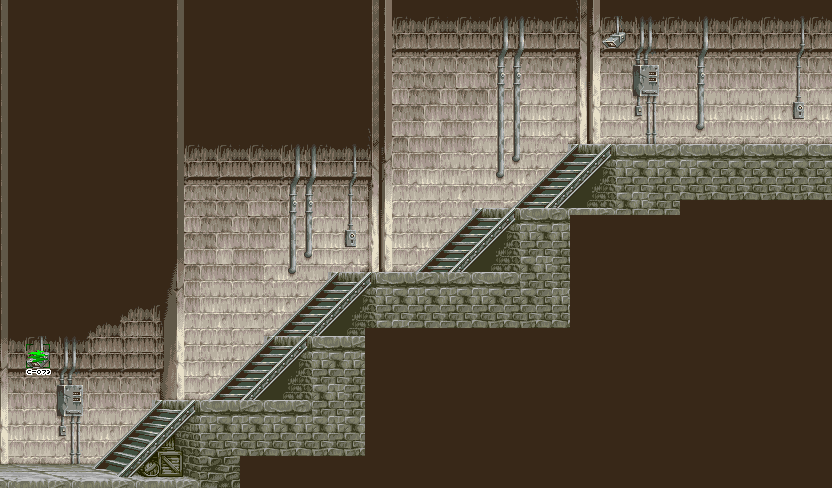
The follow-up area (5-17) only has the first Super Grenade and no other items or prisoners in the prototype, but is otherwise identical.
The Slug Flyer dock (5-26) and its corresponding areas can only be accessed via level warping. It works, but it tends to abandon you when entering another screen, making the following screens tricky to play.
The Slug Flyer sequence (5-23) is in bad shape; the player and vehicle spawn separately, with the player's spawn point positioned below the camera, killing them instantly.
You have to fiddle with RAM to freeze the player's position, break the level geometry so it can't kill them, but only for a few frames before resetting it so the Slug Flyer can 'land' on the bottom of the screen, and then guide them into it. That, or you can use the savestates bundled in the Cheat Engine zip in the prototype page.
All that for a level that consists only of three enemy planes that go down in just a few shots, before warping you to the next screen and killing you again. Marvellous.
Piloting the Slug Flyer will print coordinates on-screen, seemingly tracking its direction, movement, and acceleration. Its missiles won't fire, and pressing the L Button will simply eject the player rather than perform its kamikaze attack.
Getting hit by an enemy missile will make the vehicle fly to the right of the screen for some reason. If the Slug Flyer is destroyed, only its sprite will disappear -- its thruster flames will remain on-screen, and even the cockpit sprites! In the next area they remain intact, but on this screen they become garbled.


The same steps above are required to pilot the Slug Flyer and not die instantly, or the zip has a savestate that'll save you the trouble. It's worth it though, as this follow-up sequence was intended to be navigated entirely via Slug Flyer in the prototype, it seems!
Large chunks of the area have no floor, and what few platforms there are house missile launchers, soldiers, and Girida-Os. The enemy layout is largely the same, even with the parachuting soldiers towards the end, though the prototype has more missile launchers and is missing the final's Masknell and Girida-O stall point.
You can navigate this area on foot, thanks to some very generous (or outright busted) collision detection on the platforms, but the second-to-last column is just too high to reach. To keep the Slug Flyer intact throughout the whole section, especially with no items in place, is asking a lot, and it's likely they toned it down to make life easier on the players.
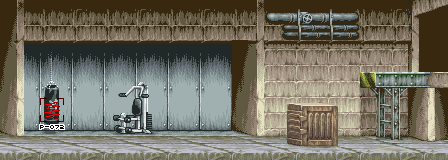
The base entrance (5-01) is identical to the final.
The final drops the spare gym equipment. The prototype has a Super Grenade crate here.
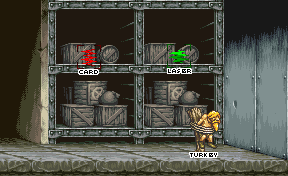
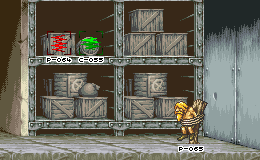
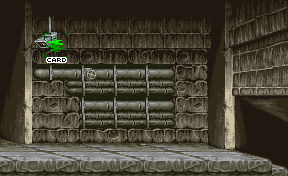
The prototype has less diversity on its shelves, and swaps the hot spot rewards around -- the prisoner gives you the Laser in the final, while the barrel gives you the card.
(final)
The final moved the prototype's Super Grenade crate to the next room, and also rearranged the girders holding up the platforms.
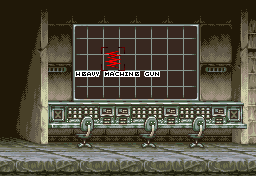
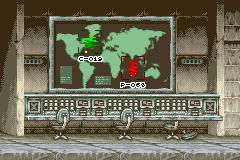
The prototype is missing the animated monitor graphics, and for some reason the final breaks the third chair. The final puts an item where the original hot spot was and moves the prisoner to the right.
5-09 is identical to the final, except the bookcase can't be destroyed. You can bounce off it though, and wriggle your way through it to the next area.
The final moves the card's hot spot from the camera to the wreckage of the Melty Honey, and busts some pipes for good measure.
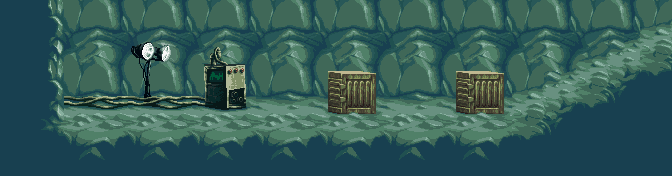
This chamber looks totally different in the prototype, and has no items in place yet.
(final)
Route 2 area 1 in the prototype has an extra prisoner and repositions the other. The final continues its destructive vendetta against third chairs.

The final adds a prisoner, moves the hot spots, and diversifies those shelves. I assume the right hot spot is a card, but I've yet to see it spawn the item properly...!
Areas 2 (5-03), 3 (5-19), and the shower room (5-04) of route 2 are identical to the final.
(final)
Completely identical, except for two wall tiles near the end. Exciting!
The final adds a turkey to this screen and adjusts the size of various platforms.
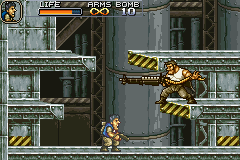
Allen Jr. isn't in the best shape; he'll spam his grenade-throwing animation when above the player, but can't actually throw any. His AI remains the same in his second phase, meaning he prefers to keep his distance instead of trying to melee you. He'll float in midair when killed and drops no item.
(final)
Route 3 area 1 is identical to the final except for its lack of items and a couple changed wall tiles. Exhilarating!
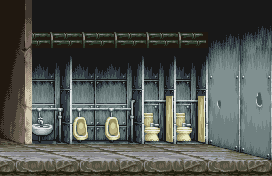
The final squeezed in another sink. Two queues, less waiting! Prisoner locations are identical.
(final)
The final brings the second set of stairs forward a bit, otherwise identical.


The walls are so low in the prototype you're forced to crawl under them, and the space between them is a stall point full of soldiers. The final raises those walls but adds a new one for you to jump over.
The boss exists only as a discoloured animation loop. The prototype is notable for including a prisoner in the boss arena that drops ammo; no boss in the final has prisoners on the field, though the Cabracan does have satellites that drop weapons when destroyed.
Walking right will warp you back to Mission 1.


