Bomberman World
Black Star
Pink and cyan electricity pylons will generator a burst of electricity every 3 seconds, which will harm you if you stand between them. Teleporters will warp Bomberman between parts of the stage, offering a second of invincibility upon exiting. There are also missile pads that can be hard to see against the background; see enemies.
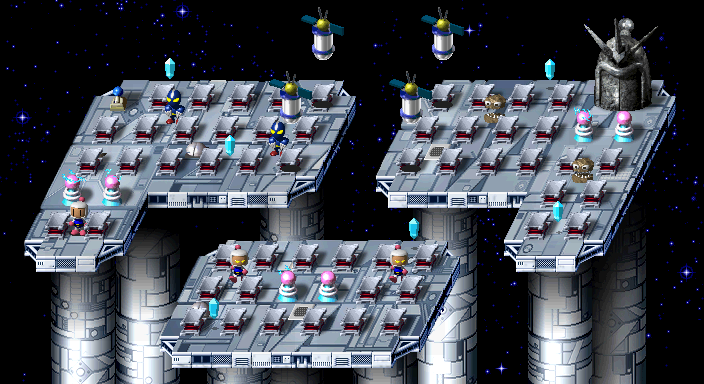
Area 5-1

ENEMIES: Saucer x 2, Missileman x 2
CRYSTALS: 4
TIME: 5:00
This stage is more cramped than it looks; the grey portion in the middle is actually two bridges with a gap between them.
Area 5-2

ENEMIES: Kuroman x 2, Holograbom x 2, Gasheen x 2
CRYSTALS: 5
TIME: 5:00
You must bomb the blue switch on the top-left to activate the satellites. They move in a clockwise pattern and will pick up Bomberman if he is standing beneath them, allowing you to access the right platform; press the bomb button to drop.
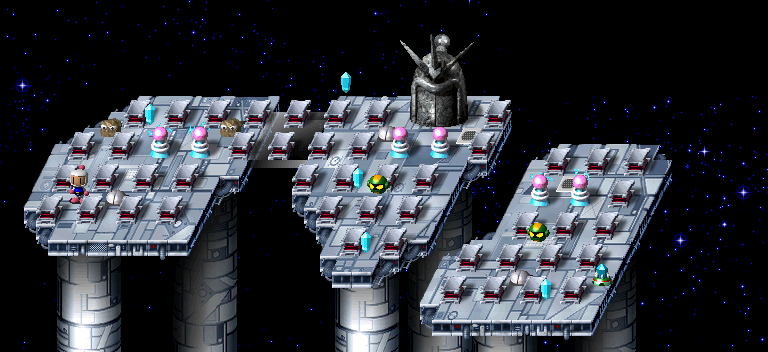
Area 5-3
ITEMS: Fire Up, Boyoyon Bomb, Bomb KickENEMIES: Gasheen x 2, Gachin x 2, Core Mecha
CRYSTALS: 6
TIME: 5:00
This stage is especially cramped, with missile pads and teleporters blocking the path of enemies and explosions, and the Gachin enemies will separate and scatter into four parts when bombed. Take it slowly!
Area 5-4

TIME: 5:00 (JP),
Bagura (バグラー) does not place bombs, and will instantly teleport away if a bomb is within 2 tiles of him. If Bomberman crosses his X/Y axis he will float into the air and perform one of two attacks, before instantly teleporting to a new position:
He can spawn two sets of 2 bombs on each side, spaced two tiles apart; they have a 7-tile blast radius.
He will launch 2 Boyoyon Bombs, which bounce around the arena before detonating; they have an 8-tile blast radius.
I'd argue it's impossible to defeat Bagura without power-ups - he's designed to react to bombs close to him, meaning long-range attacks are key. If you get a game over, go and stock up! You typically want to detonate bombs when he least expects it; this can entail kicking bombs towards his path, using the Remote Control, or simply running fast and laying bombs as you run - whatever it takes to strike before he has time to teleport. Attacking him with only one bomb simply isn't ideal.
Requires 7 hits to defeat.
Area 5-5

TIME: 5:00 (JP),
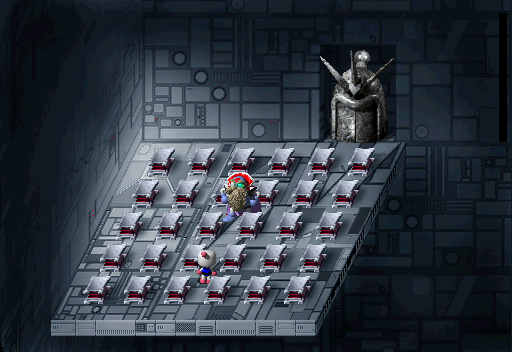
God Header (ゴッドヘッダー) slowly roams around, pursuing or strafing Bomberman, before stopping of its own accord.
If its eyes glow yellow, it will fire a laser beam to where Bomberman is standing.
If bombs are on the field, it may open a hatch on its head and suck them all in, removing them from play. It will spit out evil bombs to replace them (up to 5 in total); these pursue Bomberman until they are within range before detonating with a 2-tile blast radius. The evil bombs will not be generated if God Header is attacked during this animation.
The base of its body and its feet are vulnerable, though there are lots of gaps where bomb blasts won't touch it, and you can even walk safely beneath its sprite to some degree. Fighting without power-ups can be tricky, as you'll almost always generate an evil bomb - however, their detonations also harm God Bomber, so luring them to detonate in the right position is a valid tactic.
Use its laser attack as an opportunity to place bombs into position and keep moving; make sure not to retrace your steps, and it shouldn't be able to hit you. Lock-On Armor can be helpful at finding God Header's weak point, particularly when it's moving, and it doesn't freeze in place to launch bombs like Nyanjiro does, allowing you to hit and run.
Requires 11 hits to defeat. Worth 10000 points.

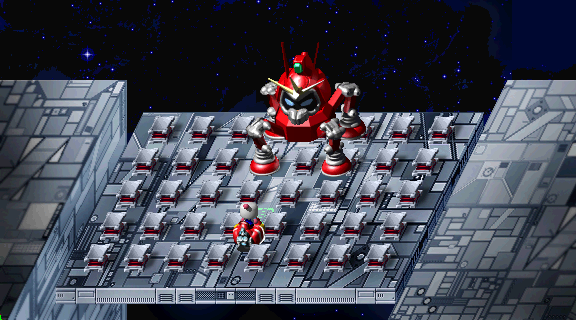
God Bomber (ゴッドボンバー) is the second form of the final battle. Dying to this fight will pit you against God Header again.
Placing bombs near God Bomber can prompt it to suck them up and erase them, before slamming a fist into the ground at the centre of the arena, generating three shockwaves that travel downwards - one straight, two diagonal.
Electricity pylons sprouting from its shoulders will fire lasers at where Bomberman is standing; this is faster than God Header's version of the attack, so don't stop moving.
After the orbs surrounding God Bomber have been hit twice, it will no longer use its pylon attack and deploy two laser cannons, which travel up and down the opposite ends of the arena. They will fire lasers on most rows, effectively creating bullet patterns you must weave through to avoid damage. Each cannon requires 2 hits to destroy, but will instantly be replaced by a new one.
God Bomber is invincible, and you must lower his shield by destroying the 4 orbs circling his body. Each orb requires 3 hits to defeat (changing from green to yellow to red); you cannot bomb behind God Bomber, they can only be attacked from the front or low sides. You can safely stand in the left and right corners of the orbs' circle; standing in the centre or touching God Bomber's arms will harm Bomberman during certain animations.
You wouldn't be wrong to describe this boss as as bullet hell. The collision detection on the lasers can be unpredictable, and it's tricky to keep track of all the dangers with so many projectiles on-screen, the risk of shockwave attacks, and keeping track of your own bombs! Although the very top corners rarely see laser fire, be aware that you cannot see if lasers are incoming from behind God Bomber. It's not worth attacking the cannons, you're not given enough respite before they respawn.
It's possible to defeat the boss without any power-ups, though it's a total gamble whether or not the pylon lasers will hurt you. Walking in U-turns between the left and right corners of the orbs' circle, dropping bombs in position and taking diversions to avoid attacks as necessary, seemed all that was necessary to defeat the boss. It did take a dozen tries, mind, so it's not exactly a surefire tactic. Lock-On Armor is particularly helpful if it's survived this far, allowing you to launch bombs into the middle of the orbs effortlessly while you worry about avoiding attacks.
Requires 4 hits to defeat. Worth 10000 points.
Lock-On Armor / ロックオンアーマー
 A red hovering pod-like vehicle. Can survive two attacks.
Normal ability: By default, launches a bomb 2 tiles forward. Can lock-on to enemies and launch bombs to their position from 5 tiles away.
Special ability: Same as the normal ability, but bomb blast radius is increased to 8 tiles.
 Saucer (ソーサー): A blue flying saucer. Moves slowly and aimlessly. Will fire a projectile at Bomberman on sight. 400 points.
 Missileman (ミサイルマン): A blue and red missile. Moves slowly and aimlessly, but will follow Bomberman if close to him. Detonates with a 9-tile blast radius when destroyed or if it collides with Bomberman. 400 points.
 Kuroman (クローマン): A blue robot with claws. Will speed up slightly and pursue Bomberman at close-range. Can extend its claws 2-tiles forward if it gets within range of Bomberman; this attack can pass through hard blocks. 400 points.
 Hologra-Bom (ホログラボン): An evil translucent Bomberman. Moves slowly, changing direction every 2 tiles. Can throw a bomb 2 tiles forward with a 4-tile blast radius. 200 points.
 Gassheen (ガッシーン): A rock with teeth. Moves slowly and aimlessly. Can munch on bombs, removing them from the field. 800 points.
 Gattain (ガッタイン): A string of 4 green orbs. Moves slowly and pursues Bomberman when at close-range; can move through bombs. The four orbs seperate when bombed once, and need bombed individually. 800 points.
 Core Mecha (コアメカ): A roaming machine carrying a crystal. Moves incredibly slowly with no real direction. Drops a crystal when destroyed. 400 points.
 Missile pad (ミサイル発射): Not counted as an enemy, more of a level trap. A dome on the stage that, if Bomberman shares its X/Y axis, will fire a missile in his direction which can detonate bombs on contact. Can only be destroyed when it is exposed. Awards no points.
| RETURN TO GAME INDEX |
RETURN TO MASTER GAME LIST |
RETURN TO HOME PAGE |
| page last modified: 08/03/2019 | ||
